Hye guys nice to meet u all again, as promised this time i am gonna posting about tutorial how to make gundam stand base from plastic waste frame..
For u guys just reviewing this post plss check at out my oldest post tq..
Now check this out;
The Tools
Tamiya Extra Thin Cement
Masking Tape, basic type
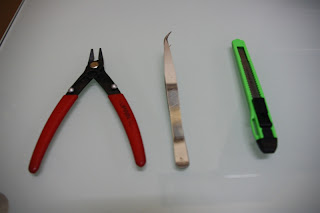
Side Cutter, Clipper, Sharp Knife, Lighter n ofcoz the model kit plastic frame waste
First Step
For the first step;
Imagine the shape structure, the gundam kit size to put, the stand base colour n ofcoz u guys must choose the colour from plastic frame that u have or for easy way u can draw plan to get the images, below the easy drawing image that i draw using basic window software
using triangle shape for the stand, this shape structure suitable for wall hangings type action stand base..
&
&
here real stand base picture to compare with drawing image to make u guys more understand he2..:D
the instruction arrow from the drawing has 3 colour;
red:- where ur gundam model kit gonna put/stick
blue:- the place u must glue using extra thin cement
green:- place for nail to hanging the stand base..
Second Step
use masking tape to tide up all the side plastic frame that connect together to shape triangle structure as shown above, at this stage u guys can make any adjustment or modification depent on ur imagination to make the stand base more multifunction..
Here some example picture
Third Step
using tamiya extra thin cement, put it few to the 3 corner of triangle shape that shown above on the drawing image, below few example picture
cut off some plastic frame with fitting length to stick together with triangle structure shape
more drawing image for u guys get understand it ;-)
blue arrow the area where to put cement & the 3 circle with shaded region is cut off image of plastic frame that combine together
during my exprience making the stand base, this binding technic actually strong enough to hold the 1/100 scale model kit at to my walls
picture the other side of triangle shape corner,
after finish putting the cement keep the stand base for few hours to make the cement do the chemical job on the plastic for make it strong hold enough..
Fourth Step
the main pillar for hold the gundam kit
made of 3 plastic rods from the plastic frame, to make the pillar i suggest u guys to cut off the extra plastic for get nice n clean pillar with sharp knife.. next using masking tape for combined the 3 plastic rods together n then cement it, the length pillar depent on ur gundam kit size with the stand base.. not to long or to short from gundam kit with the stand base..
after cement dry, the pillar now ready to stick with the stand base main body.. also using masking tape, tide up carefully the pillar to the center main body..
make sure u guys get the balancing & then cement it, ..
Here example picture after the cement dry
Last Step
bend the pillar to straight up, example as below
using lighter or ur mother stove at home kitchen, heat up the center pillar between length until it can be bend by hand smoothly..
(make sure the plastic not melt, use the heat n not the direct fire)
bend it until be like shown on the picture or depend on ur stand base angle, just make sure the the pillar straight up 90 degree angle..
Now ur action stand base 98% finish, the last step to be done is glue/cement the gundam kit holder given to the end of pillar, example is my NG 1/100 Gundam Dynames with the holder.. For 1/144 gundam kit, it is enough to let 1 of 3 stick of the end pillar fit in the hole that already made for action stand base..
Finish, ur action stand base now 100% completed
After dry completely, the gundam kit now ready to display at the walls;-) Tq for reviewing my post, hope u guys enjoy it n plss give ur comment about my blog n ofcoz about my post,
tq vely2 much adios...!


